Integrate and Deploy Kubecost using Lens IDE


We will integrate and deploy the Kubecost using Lens IDE in this blog. Let's understand tools first.
What is Kubecost?
Kubecost is a Kubernetes cost monitoring and management tool. It monitors K8S resources in a real-time and analyses the cost of it. It helps you to reduce your cloud cost continuously. Recently, it raises a $25 Million Series A fund from Coatue.
There are four features of it:
- Cost Allocation: It shows a cost per namespace, deployments, etc. It also indicates the cost for multiple K8S clusters across multiple cloud providers.
- Unified Cost Monitoring: It shows unified spending by joining real-time costs from your K8S cluster with outside costs. It supports Amazon Web Services (AWS), Microsoft Azure and Google Cloud Platform (GCP) services.
- Optimization Insights: It generates insights to reduce your costs without affecting performance and based on behaviour patterns.
- Alerts & Governance: It gives real-time alerts if your cluster overrun your configured budget. You can create and automate recurring cost reports to track your spending.
What is Lens IDE?
Lens is Integrated Development Environment (IDE) for K8S. It is Free and Open-Source Software (FOSS) by Mirantis. It is beginner-friendly. It helps you to manage your cluster easily using a desktop application. You can manage multiple K8S clusters in a single application. It provides more details about your K8S cluster. Lens desktop has a built-in terminal. You can add extensions as per your requirement.
How to integrate and deploy Kubecost using Lens IDE?
Prerequisites:
- You have configured the K8S cluster and have access to it. We will use minikube cluster in a local environment.
- You have installed the latest version of the Lens desktop application.
Steps to integrate and deploy Kubecost with helm chart using Lens IDE:
- Open Lens IDE. You will see the home page of it.
- Open a terminal and execute given below command to start minikube:
minikube start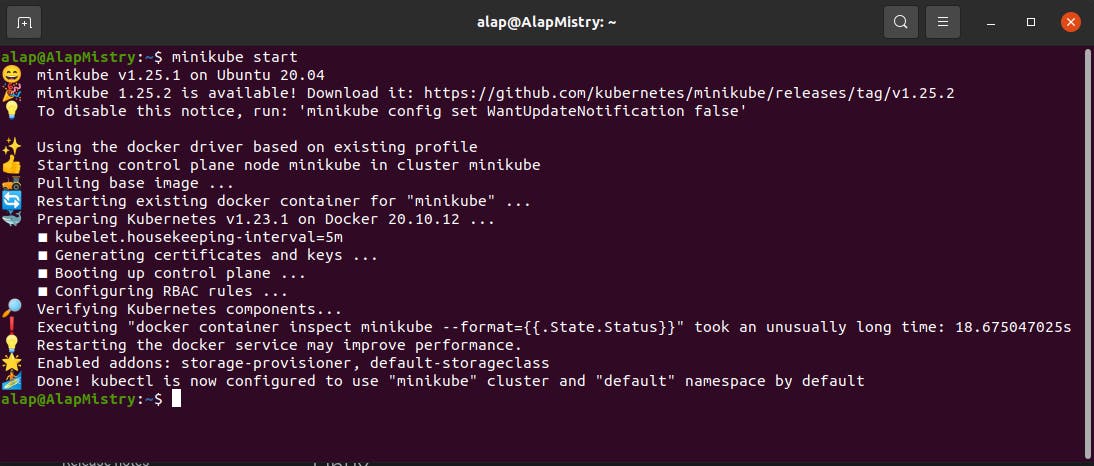
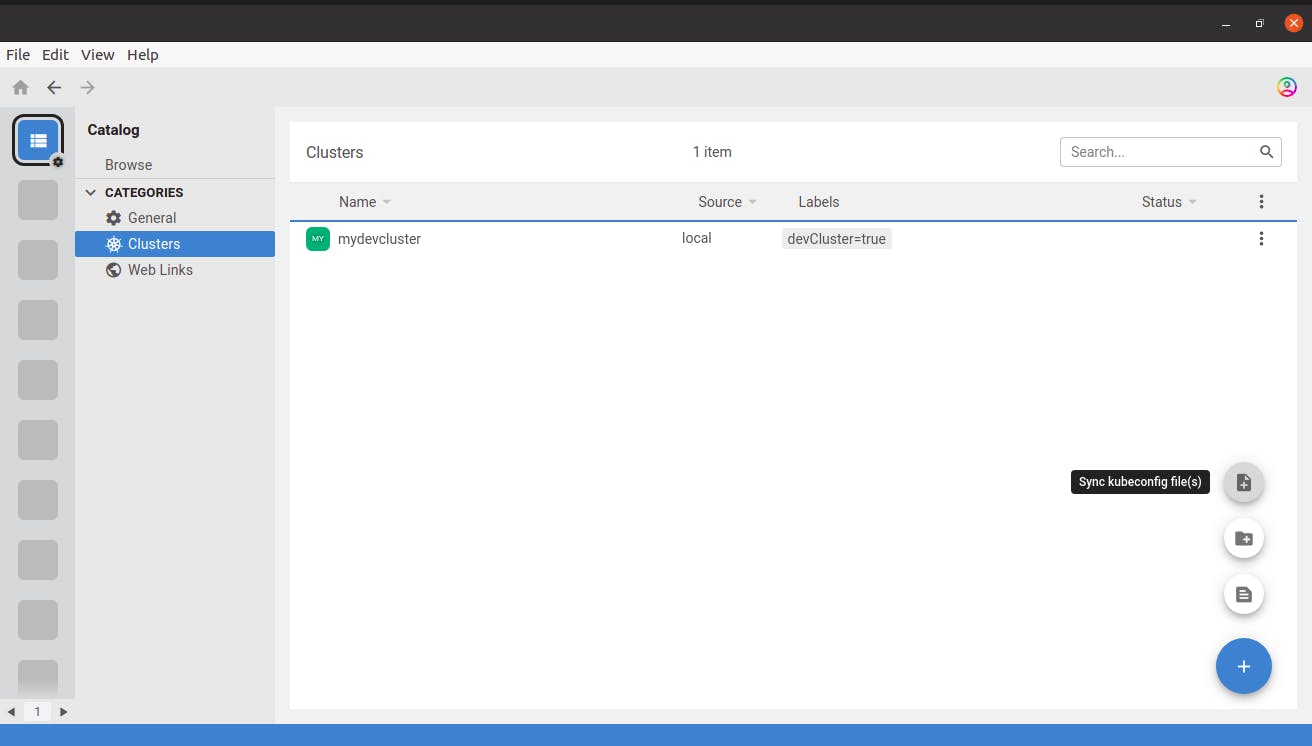
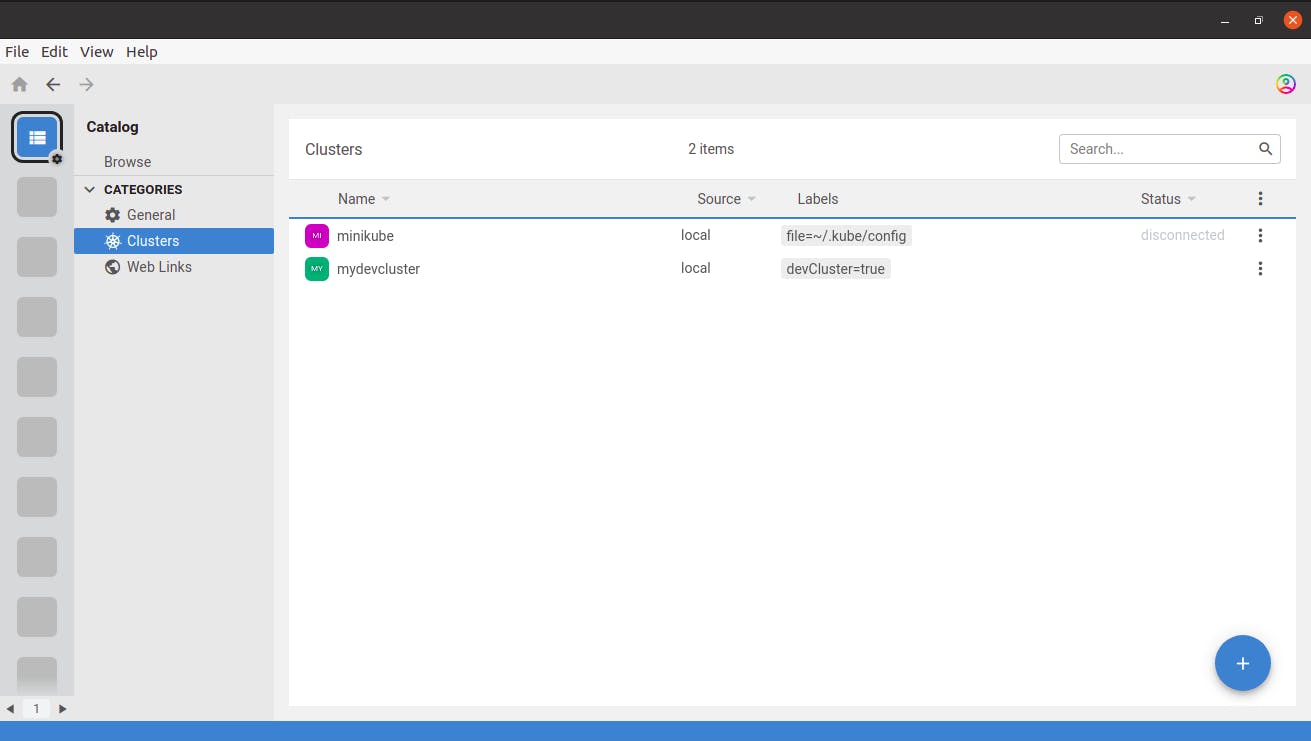
- Click on Catalog option on the left side menu. Click on Clusters option. Hover on + (plus) button and click on Sync kubeconfig file(s) option to add a new cluster.
- Choose kubeconfig file for your minikube cluster. The kubeconfig file path is
~/.kube/config.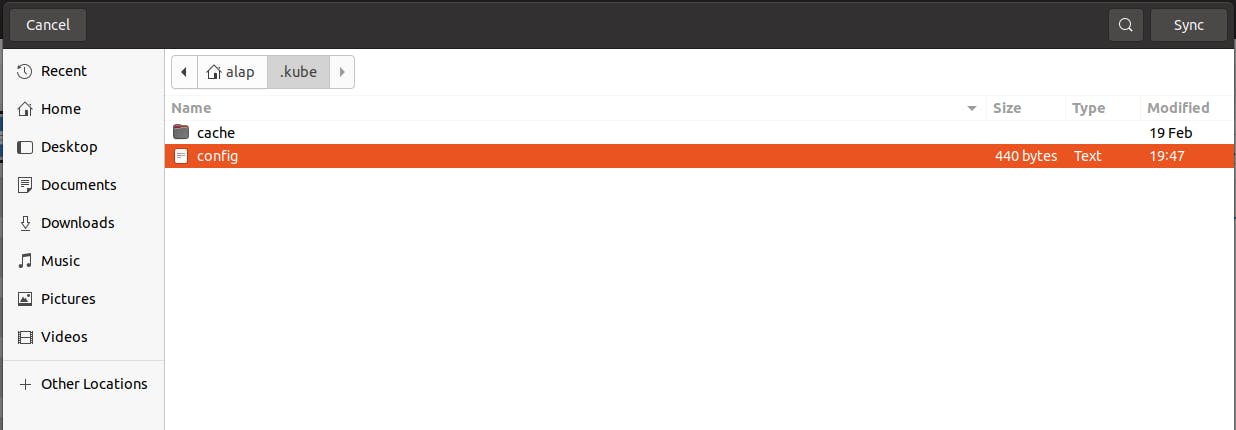
- Click on Sync button. You will see a cluster list with a newly added minikube cluster.
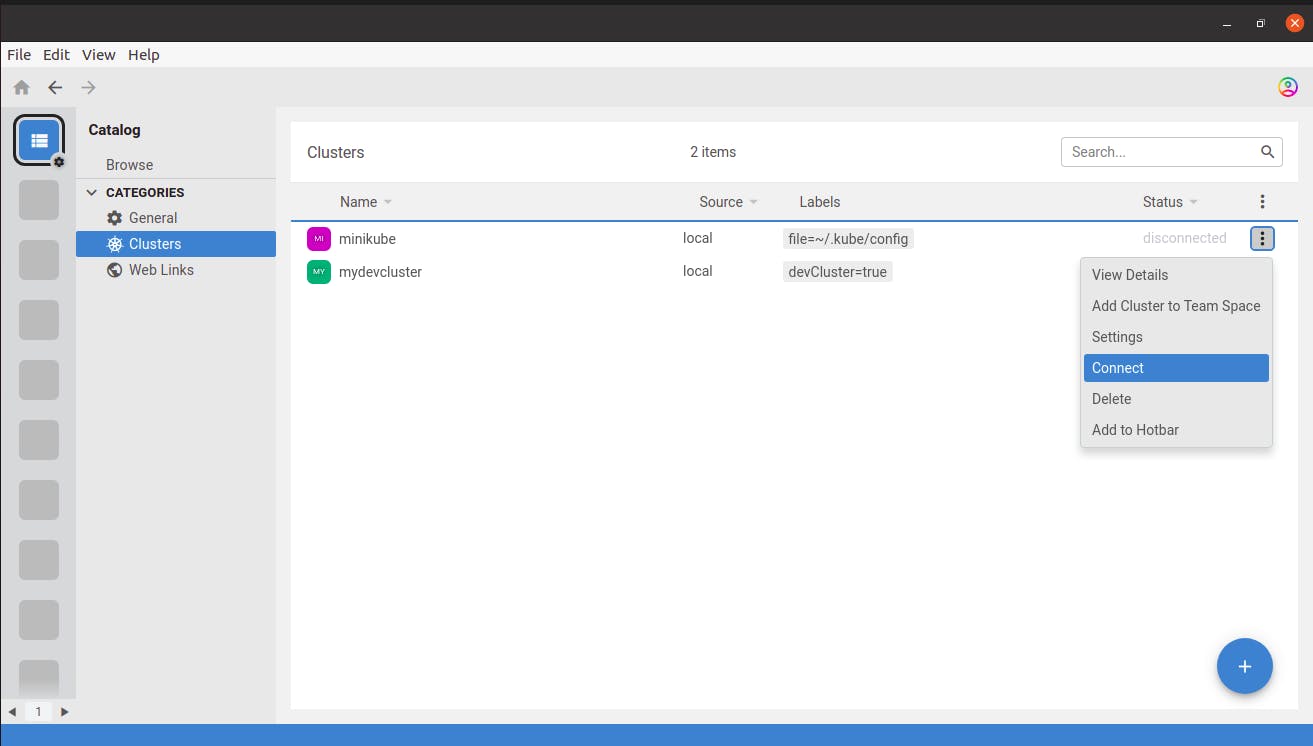
- Click on 3 dots of the minikube cluster and select Connect option.
- You will see a loading page to connect the minikube cluster. You will see details of it after completing loading. Click on ^ (up arrow) on the right bottom side. It will open a terminal. Execute this command to create a namespace for Kubecost:
kubectl create namespace kubecost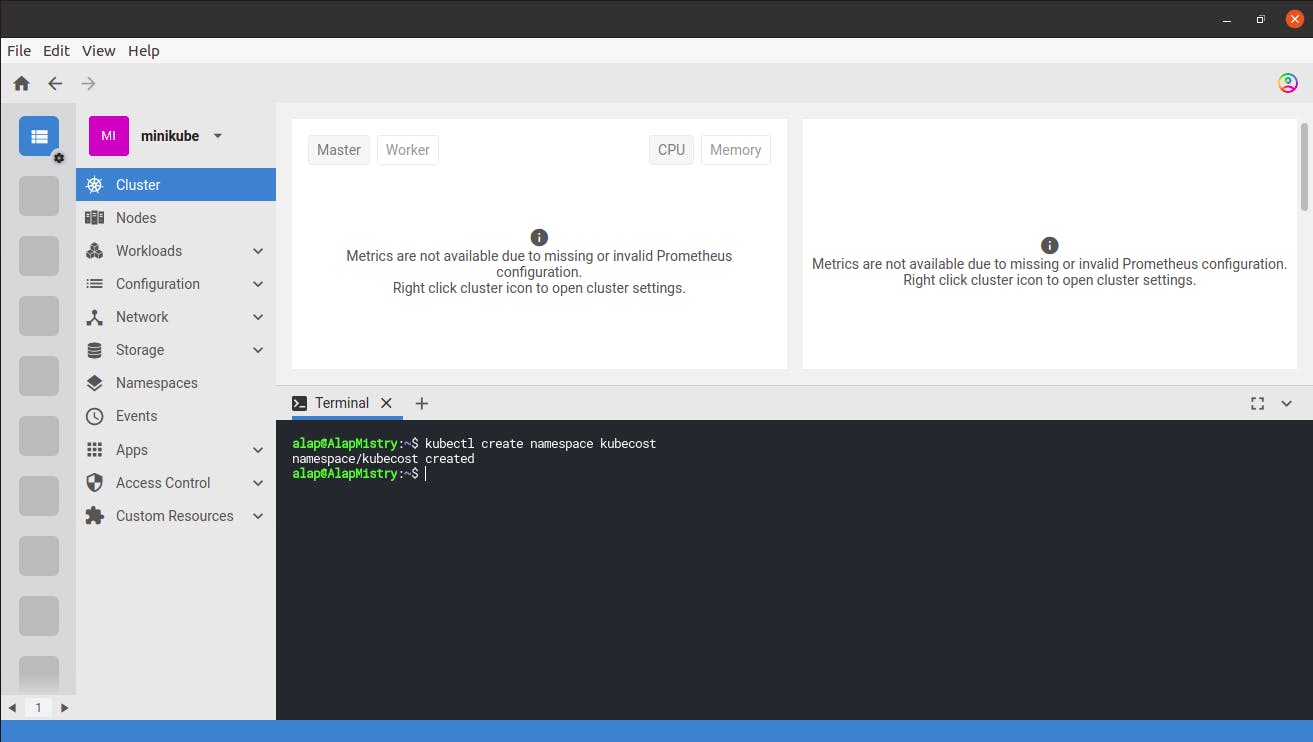
- Execute this command to add the helm repo for Kubecost: I got a message as the given below because the helm repo for Kubecost already exists in Lens.
helm repo add kubecost https://kubecost.github.io/cost-analyzer/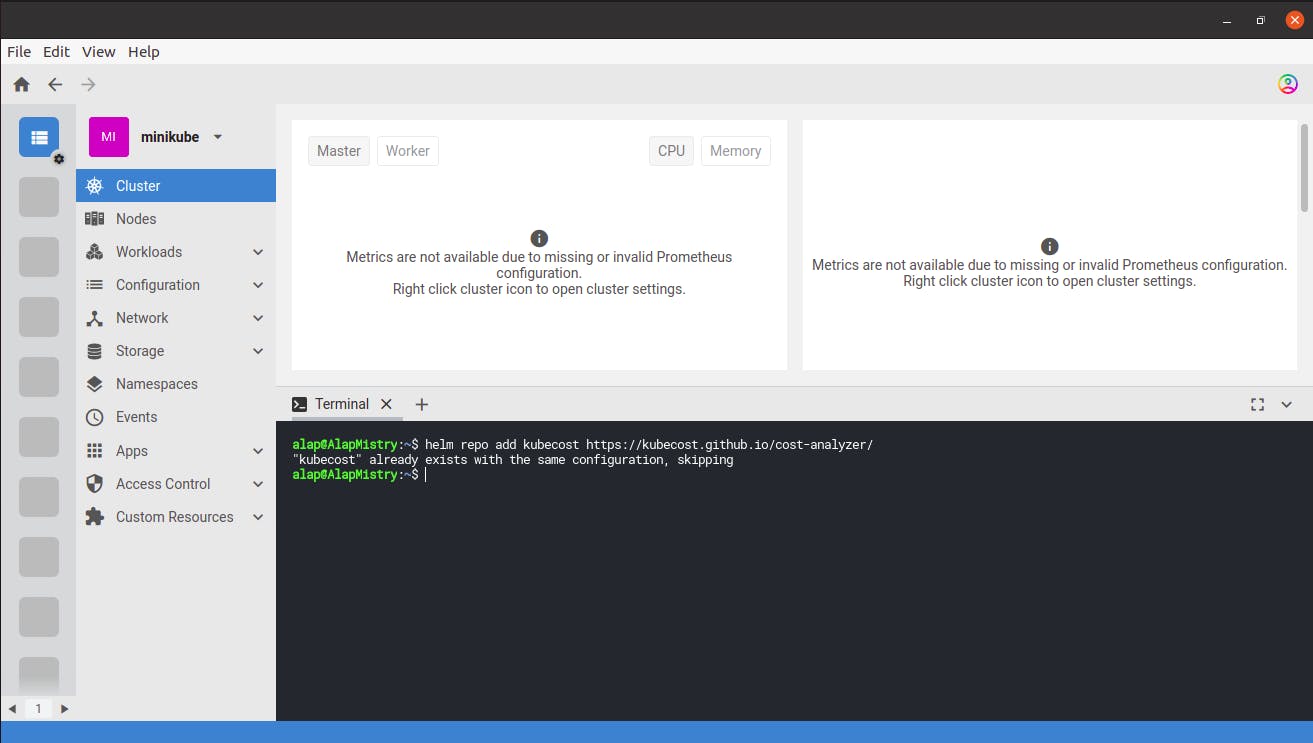
- Click on down arrow for the terminal to minimize it.
- Click on Apps dropdown and select Charts option. You will see the helm chart list. Search for
costin a search bar. You will seecost-analyzerhelm chart.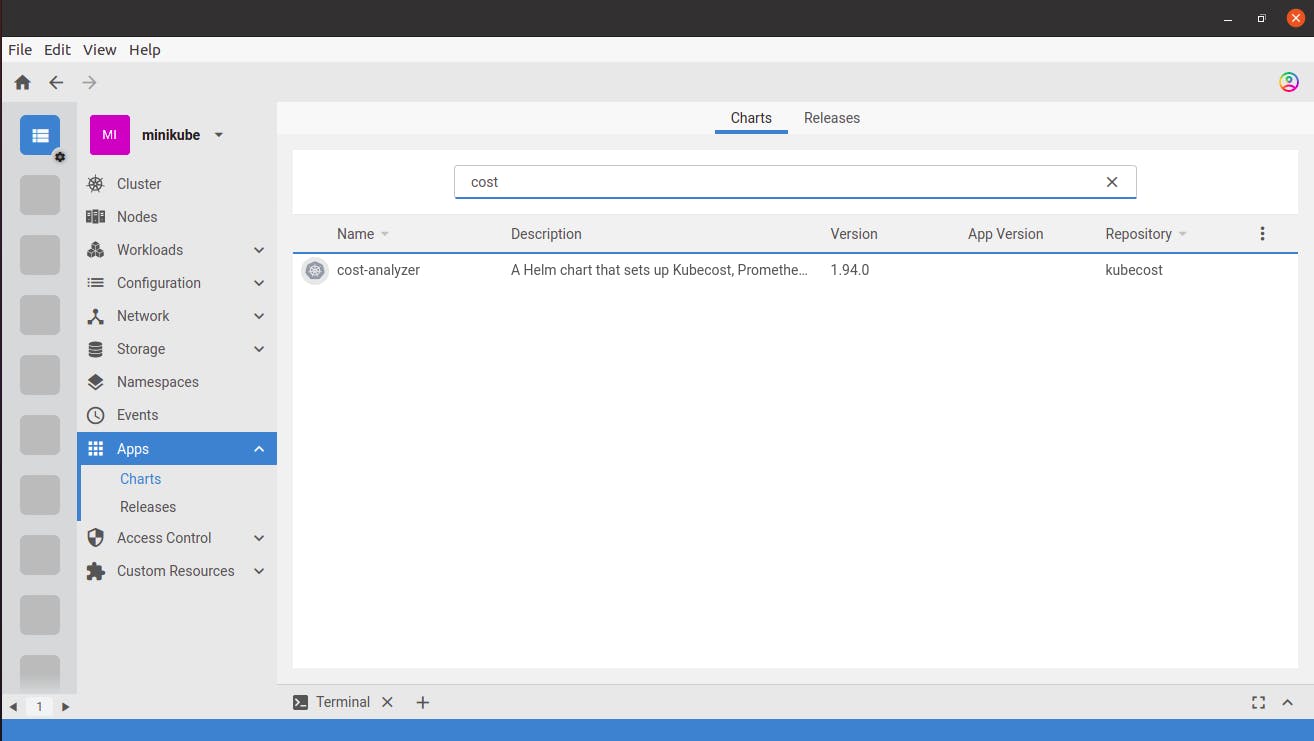
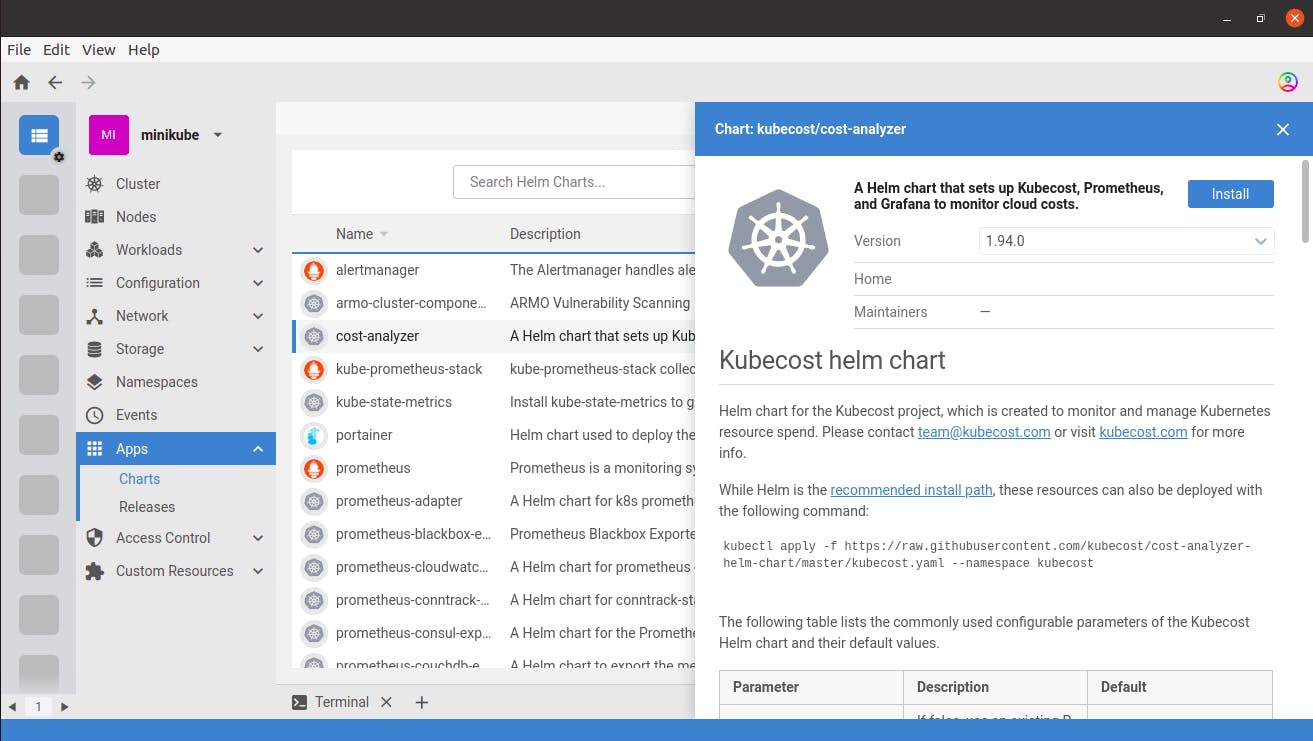
- Click on that helm chart. You will see details of it. Change the version of it as per your requirement and click on Install button.
- It will open a terminal to install that helm chart. Change version if required, select
kubecostnamespace, and add the namekubecostfor it. Click on Install button.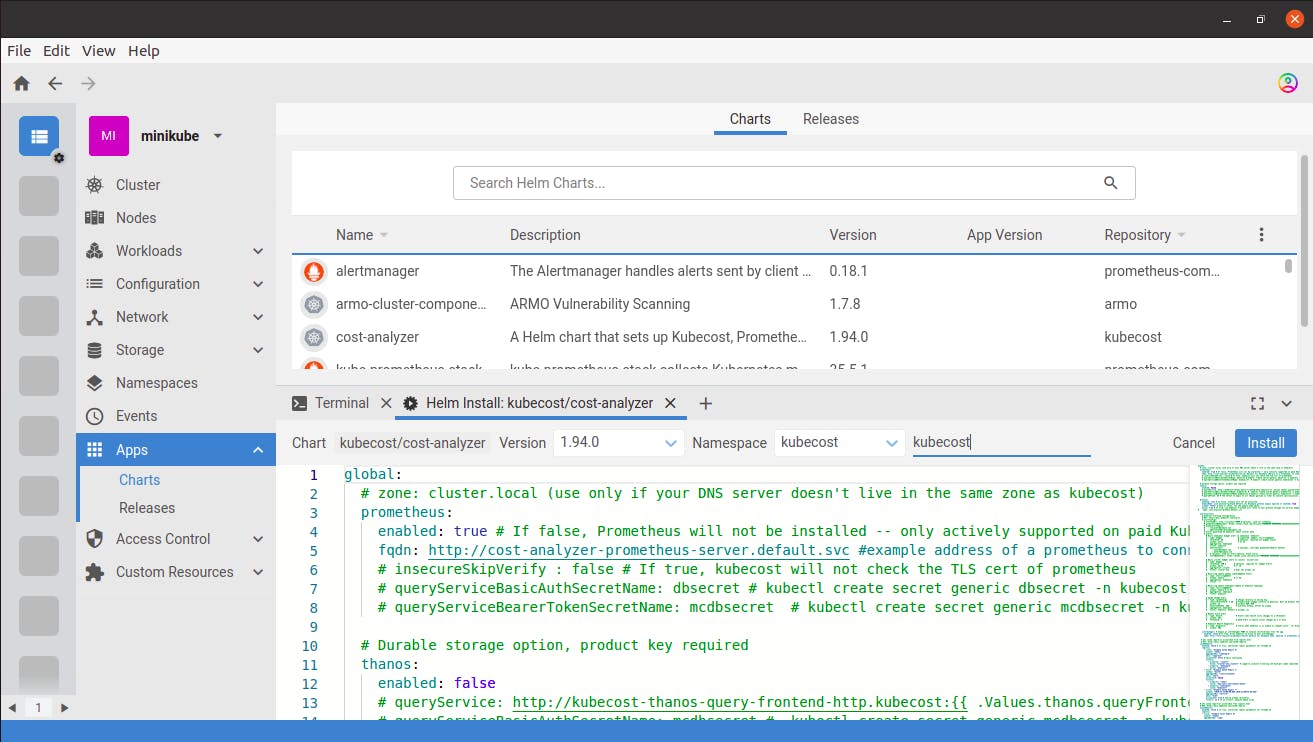
- It will take some time to install it. You will see the success message as given below after installing it:
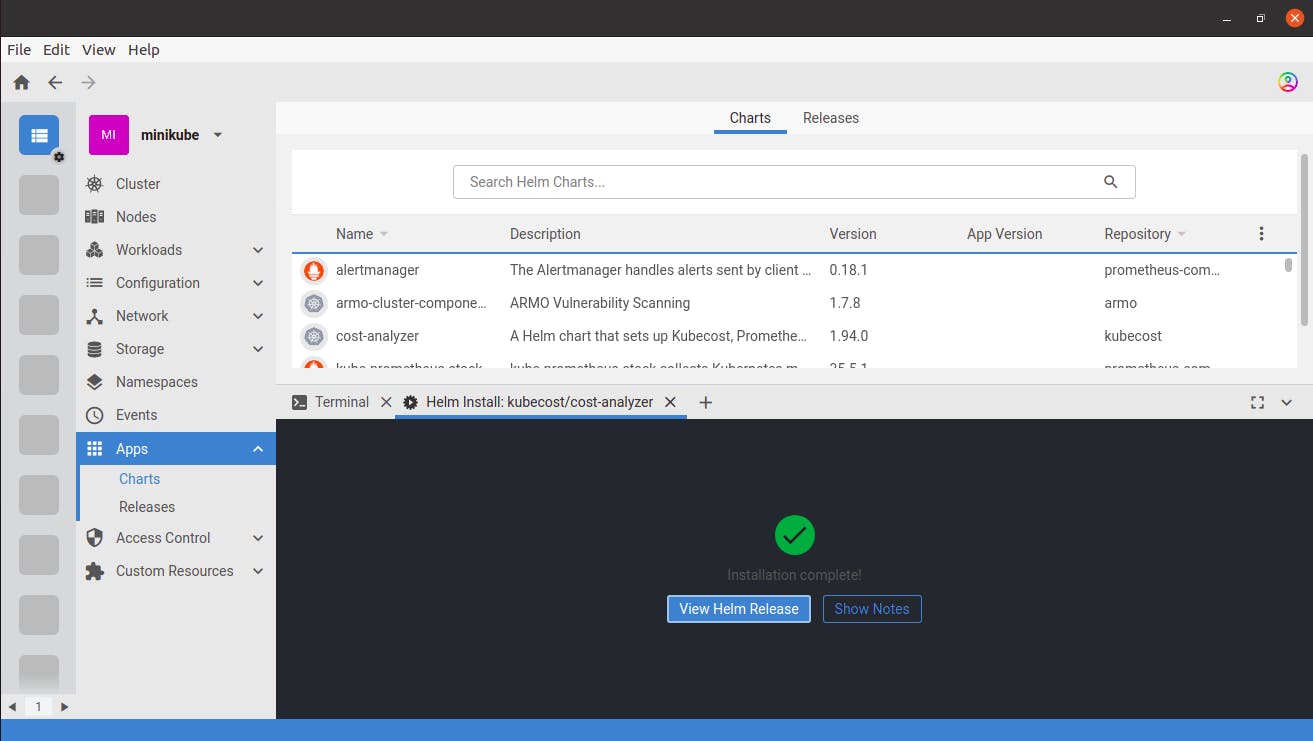
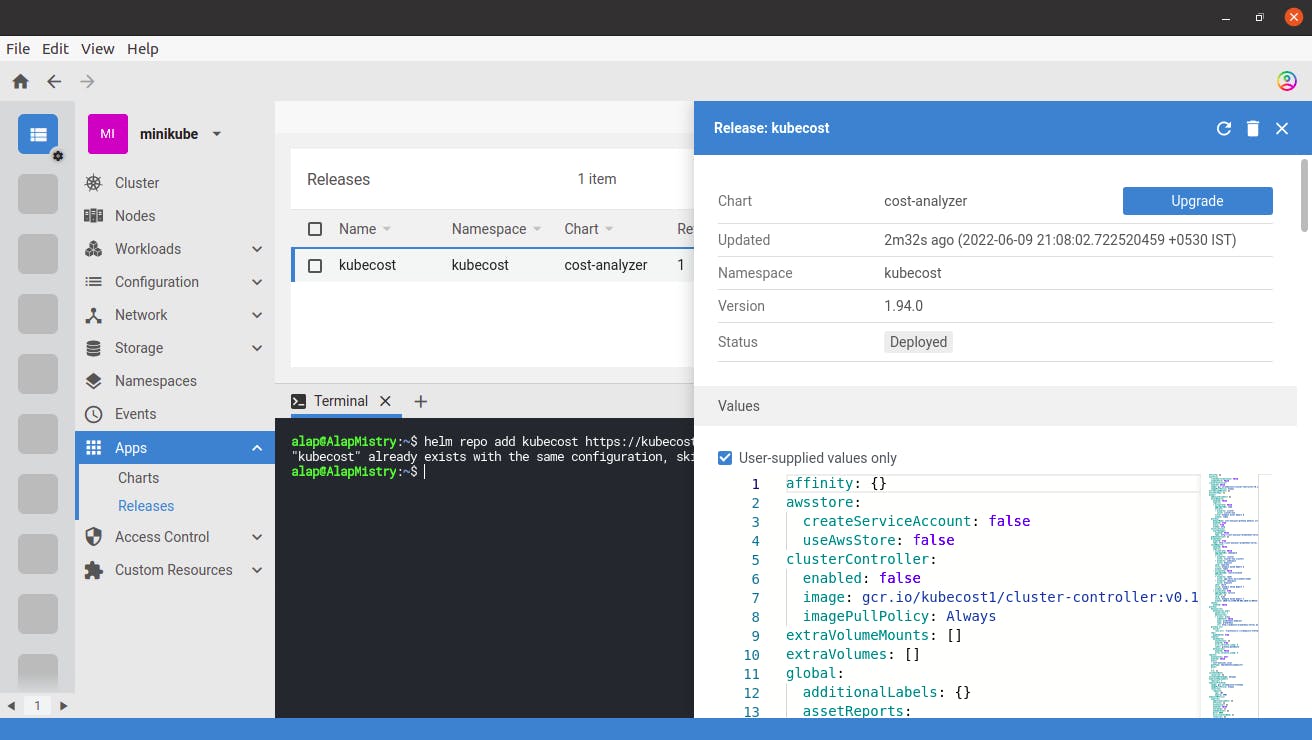
- Click on View Helm Release button. You will see details of it. You can see its status to deployed. Hence we deployed Kubecost successfully.
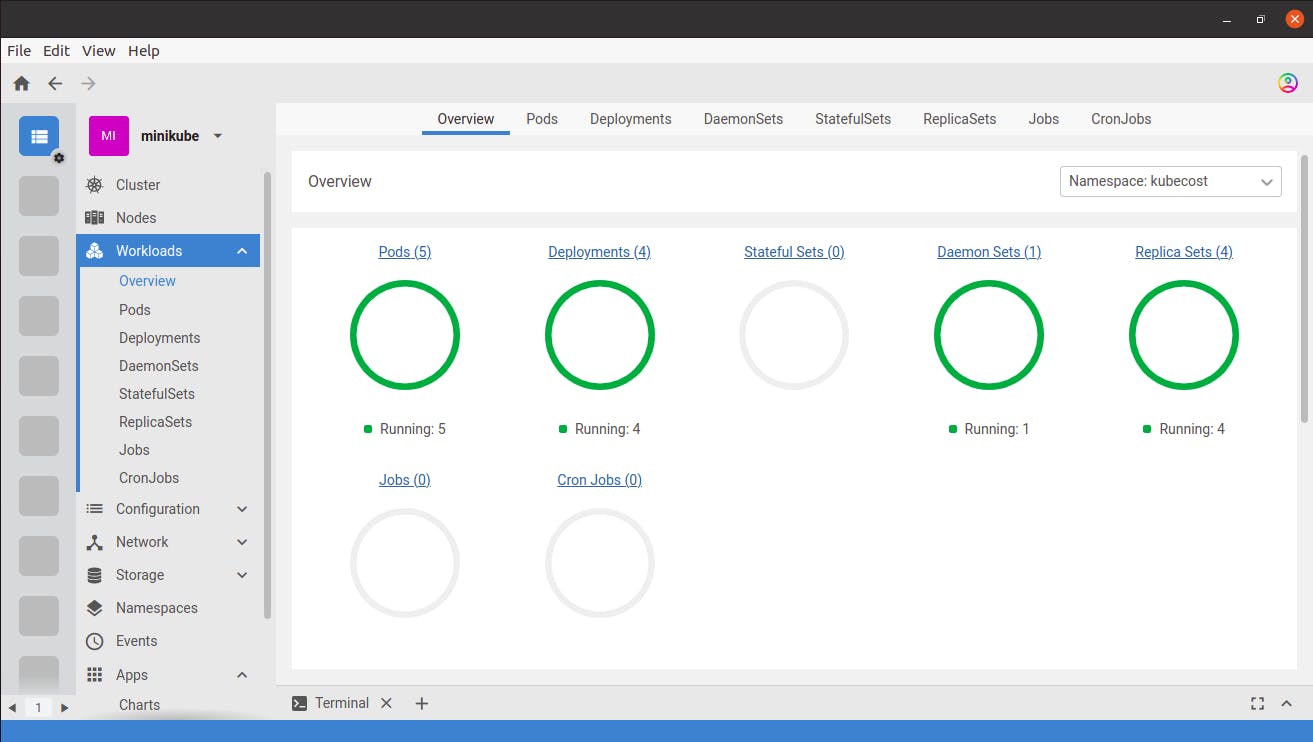
- Click on Workloads dropdown and select Overview option to verify deployment. If any workload is unavailable, then your cluster may not have sufficient resources to run Kubecost.
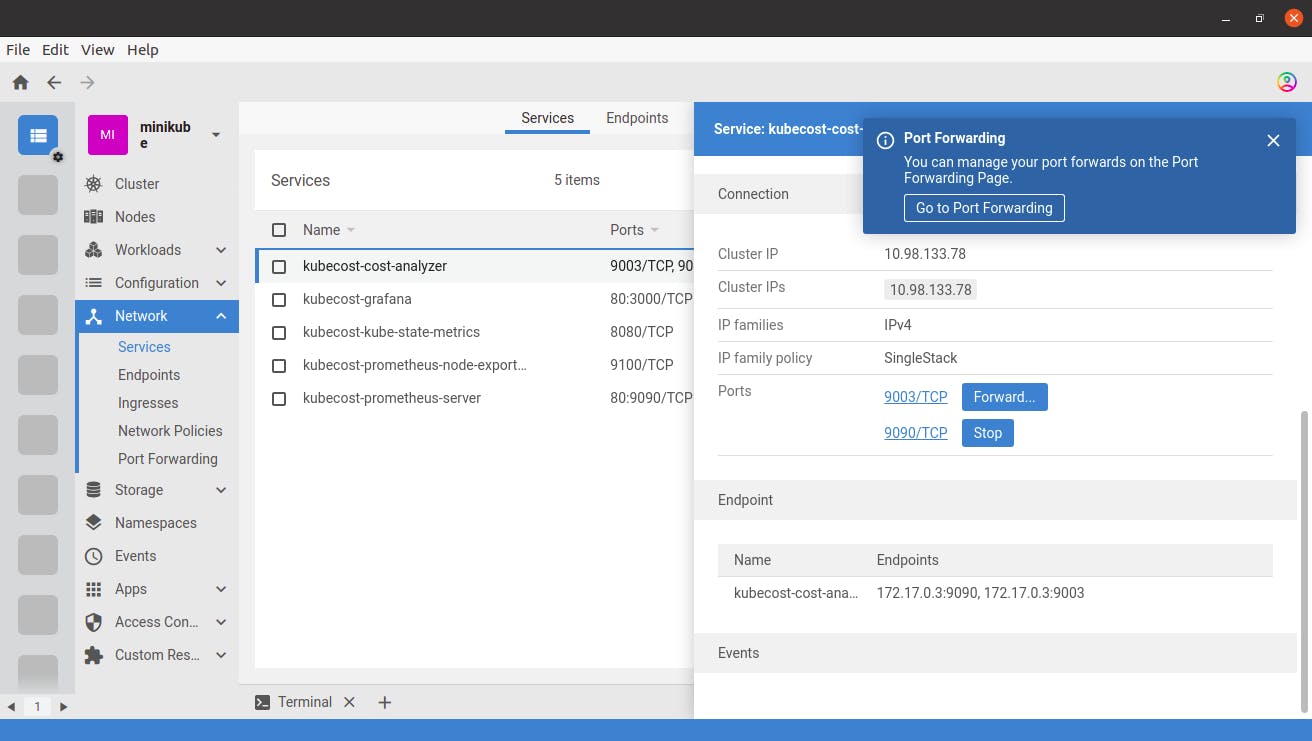
- Click on Network dropdown and select Services option. You will see the service list. Click on
kubecost-cost-analyzerservice. You will see details of it. Scroll down to Connection section.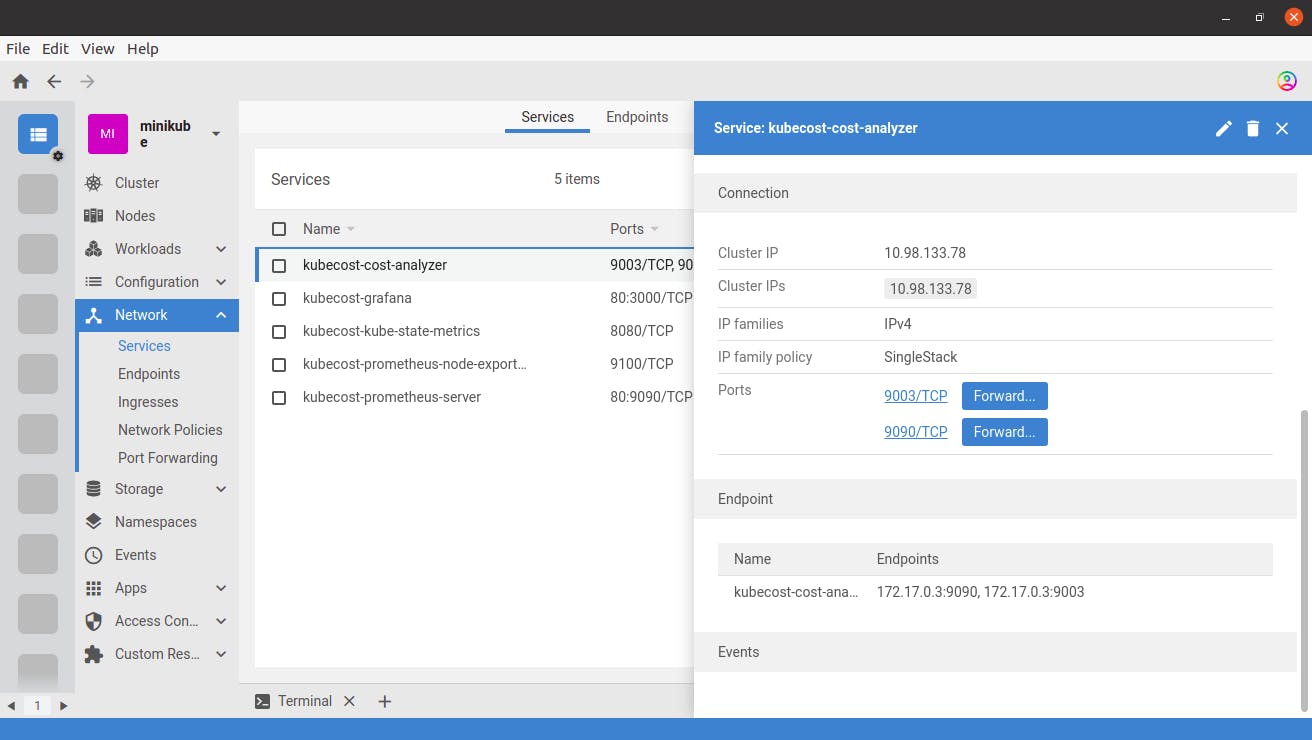
- Click on Forward... button next to
9090/TCP. You will see a port forwarding dialog. Fill9090asLocal port to forward fromfield and click on Start button. Or you can click Start button without filling the port to expose it on a random port.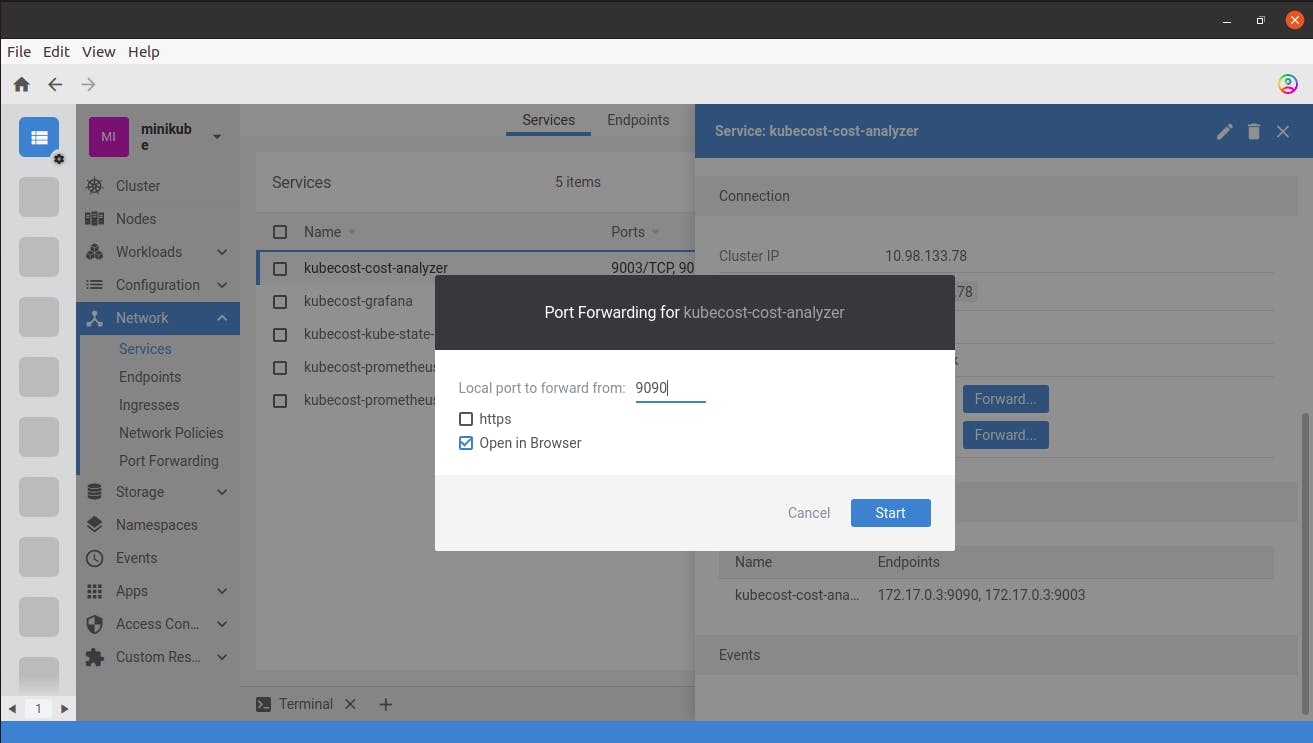
- You will see the success message as given below.
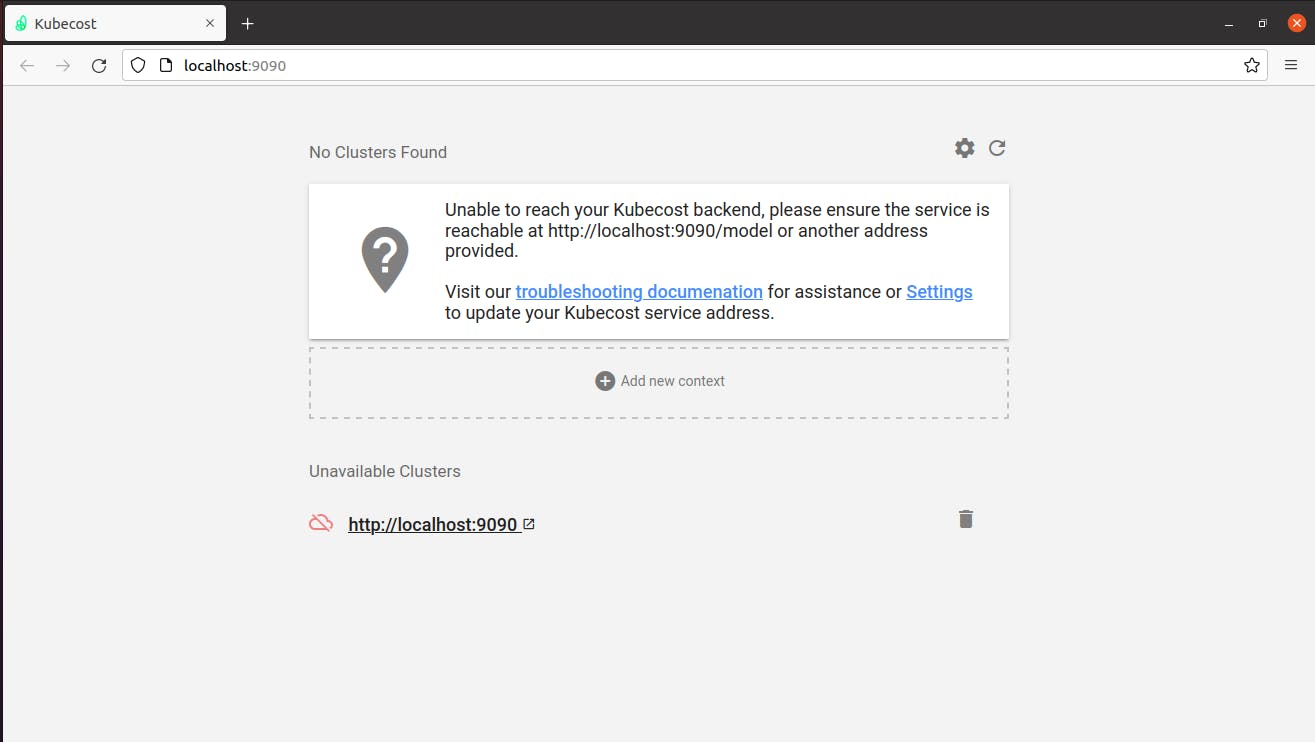
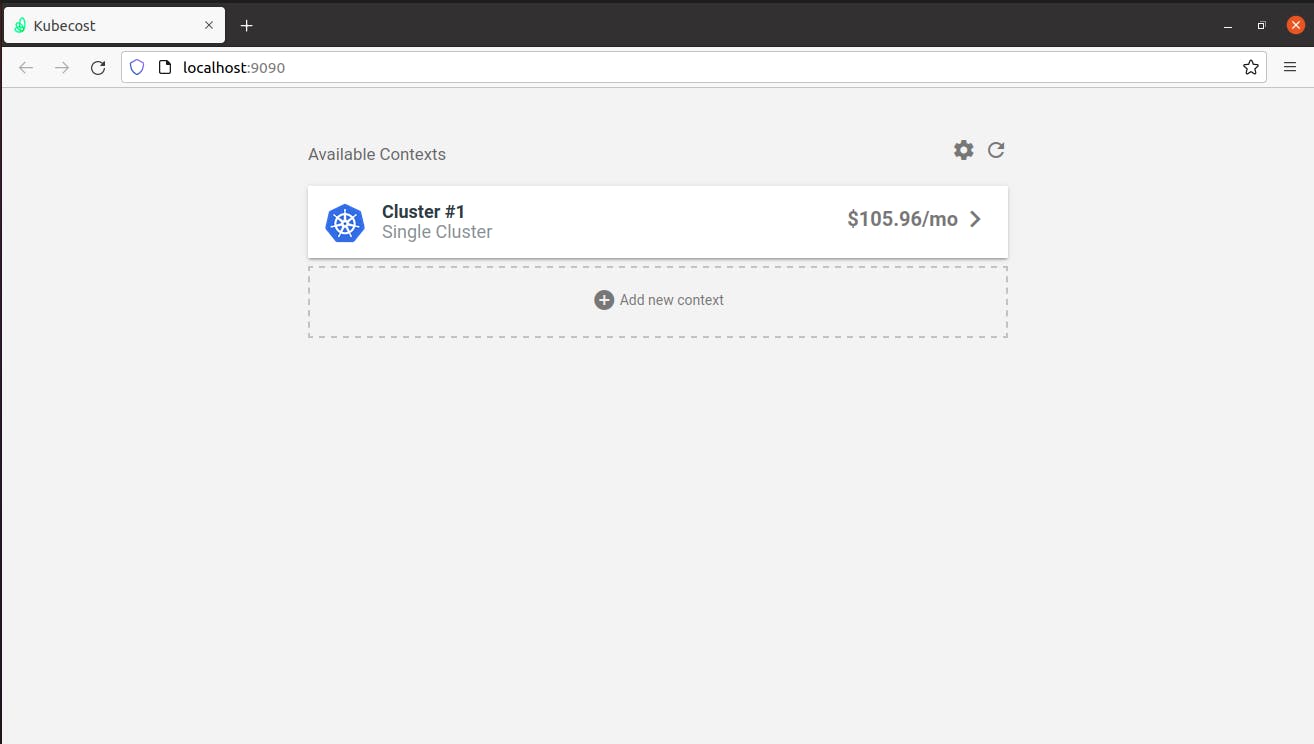
 After some time Kubecost will open in a browser. You will get a page as given below. We require to change configurations to get a cluster list for minikube.
- Click on Configuration dropdown and select ConfigMaps option in Lens. You will see the ConfigMap list. Search for
nginxin a search bar. You will seenginx-confConfigMap.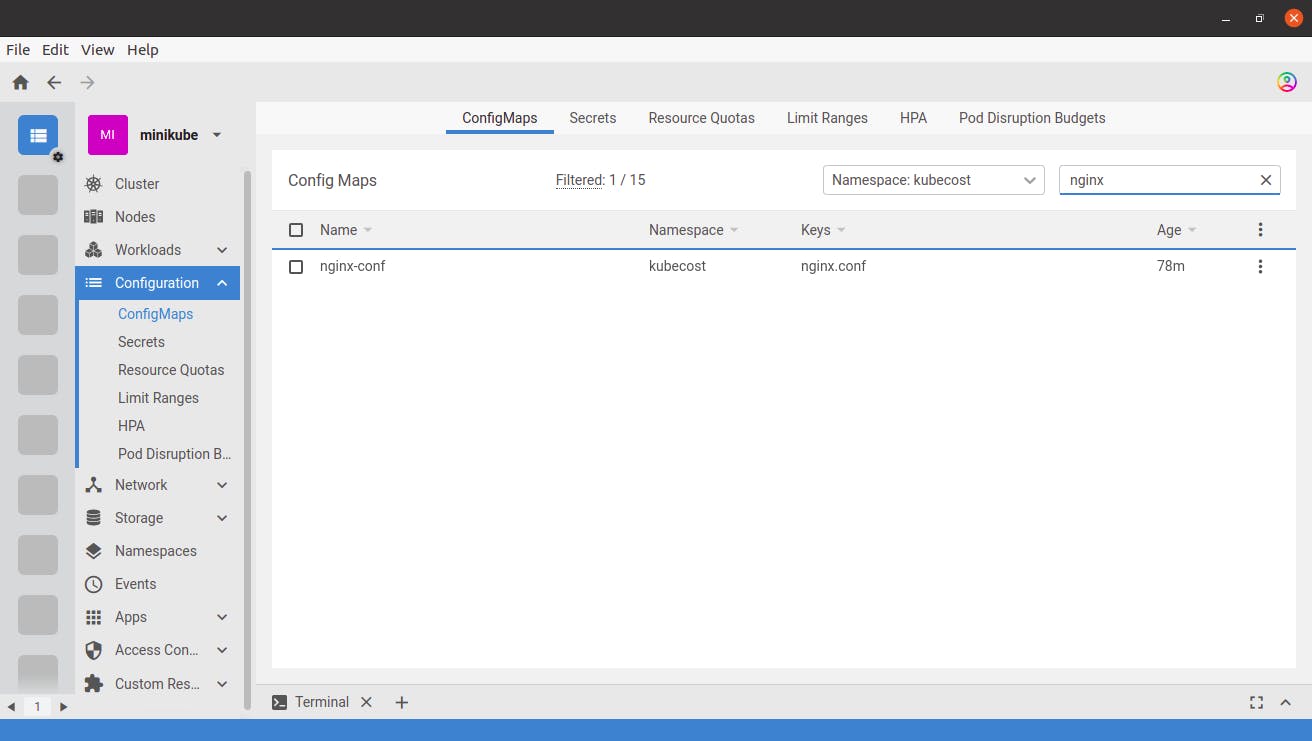
- Click on it. Scroll down to
Datasection. Changekubecost-cost-analyzer.kubecosttolocalhost. Click on Save button.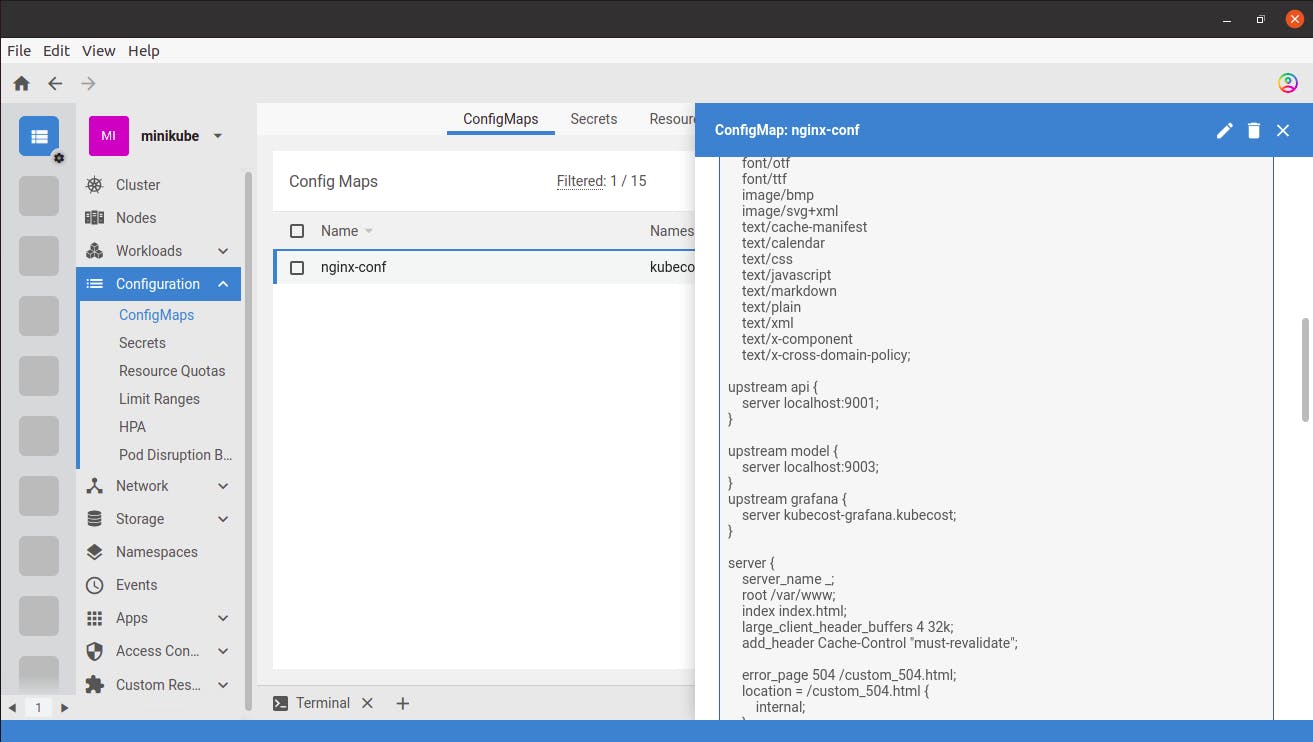
- Click on Workloads dropdown and select Deployments option. You will see deployment list. Click on 3 dots and select Restart option for
kubecost-cost-analyzerdeployment.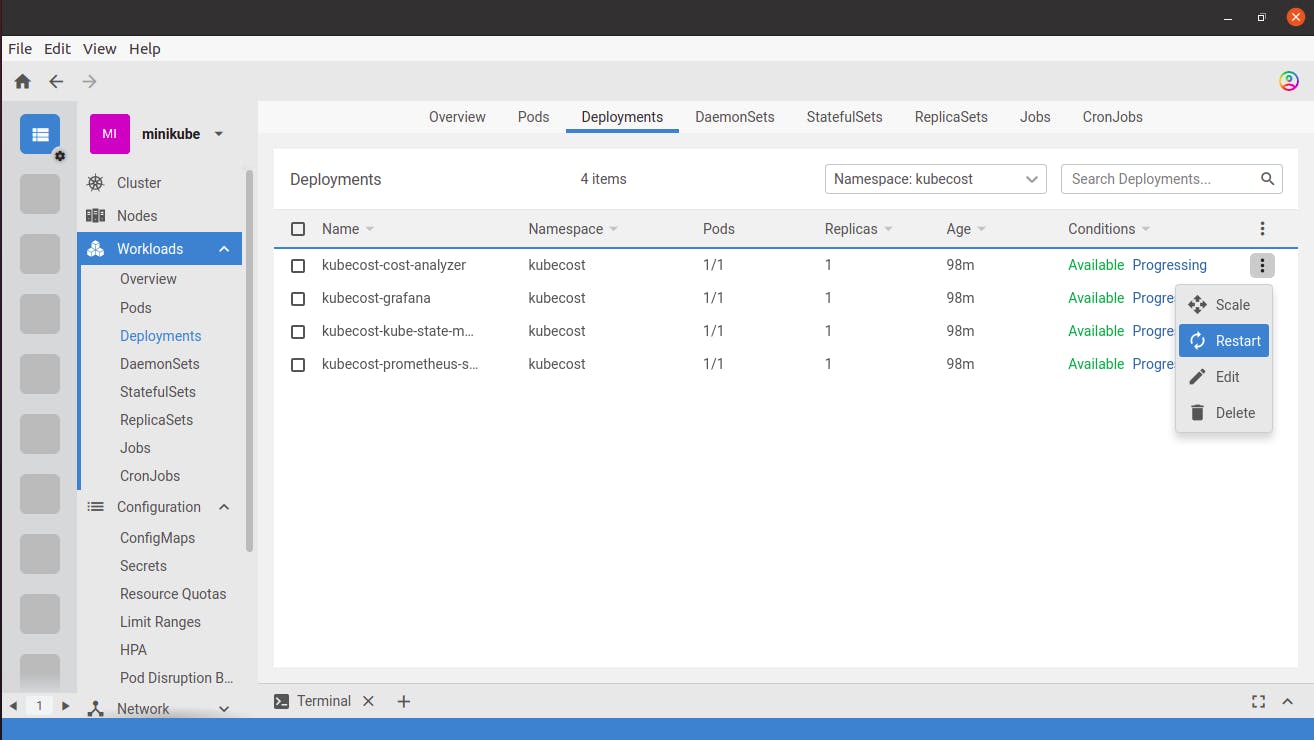
- You will see a confirmation dialog. Click on Restart button to restart that deployment.
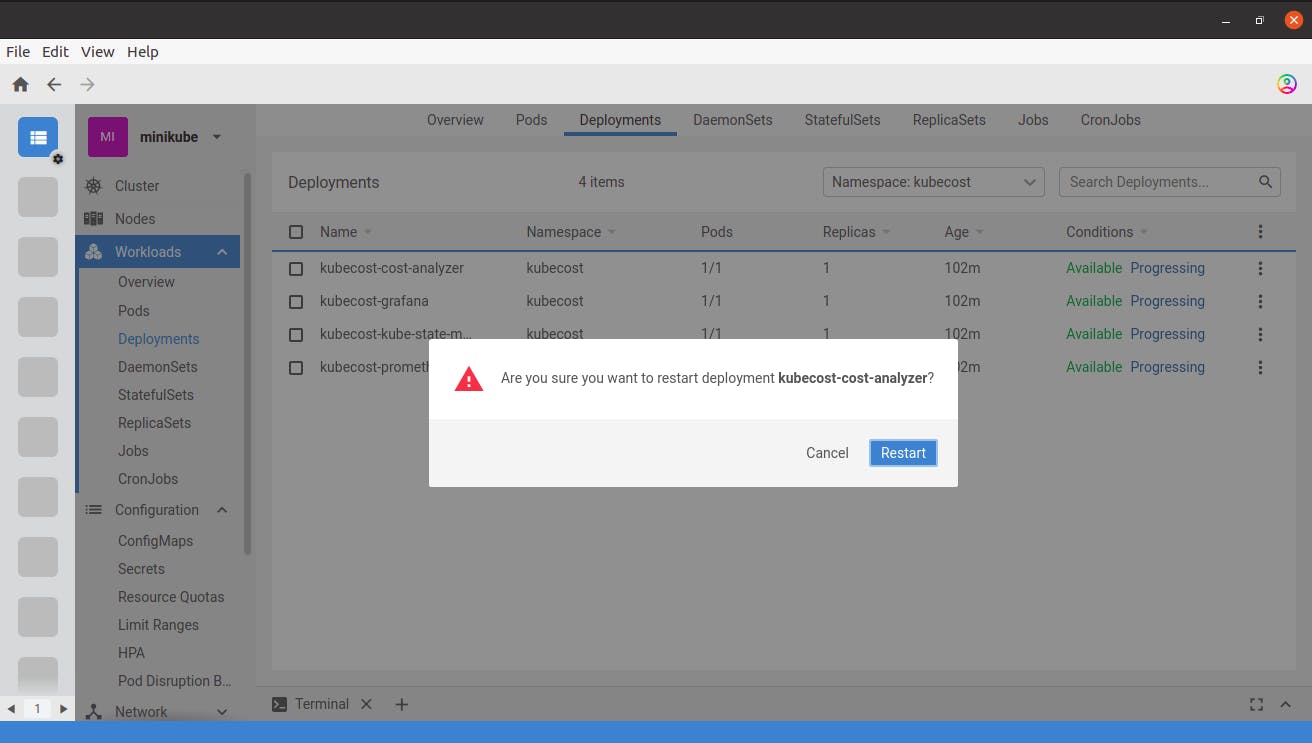
- You can verify deployment after restarting in Overview option of Workload dropdown. All resources should be running.
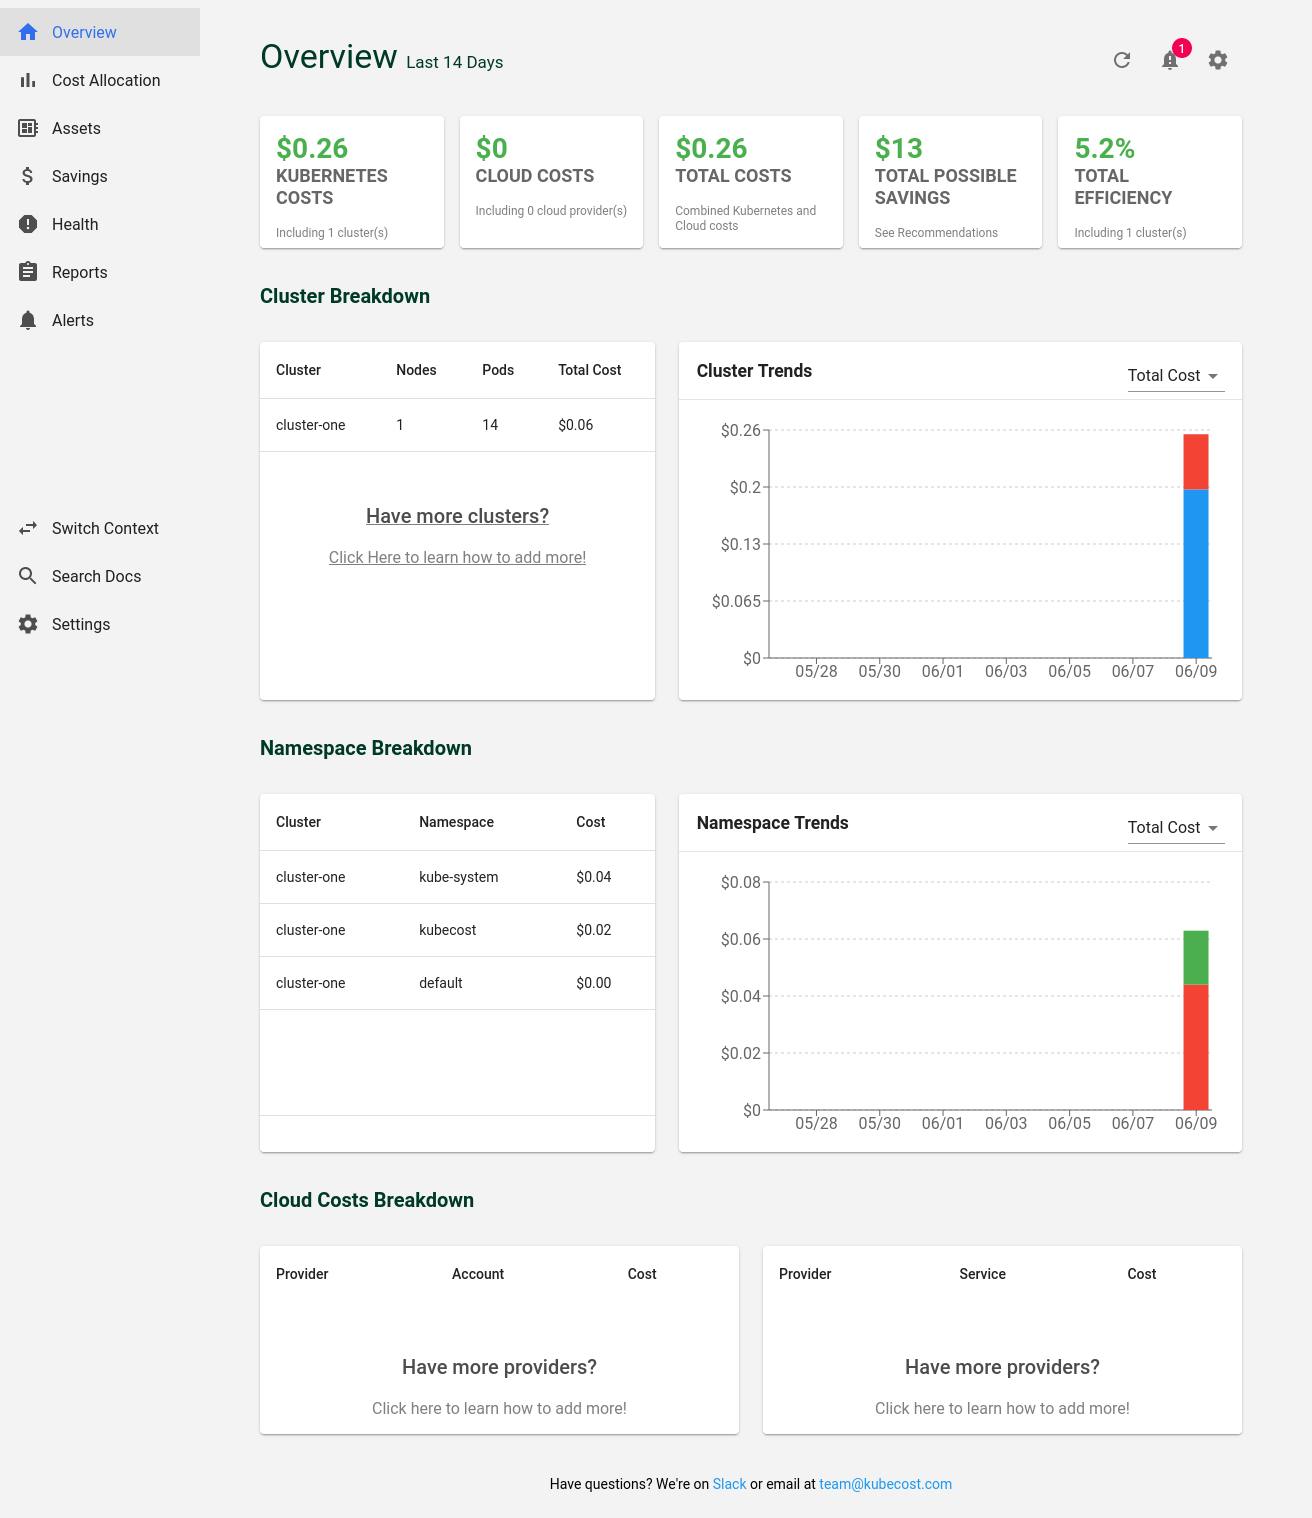
- Go to the browser and open the Kubecost tab that we opened in step-18. Now, you can see the cluster list on that page.
- Click on that cluster. You will see an overview of that cluster.
Congratulations! We successfully integrated and deployed Kubecost with helm chart using Lens IDE.